My Relanote Getting Started Guide
Relanote can be as simple or as complex as you need it to be. At its basic, it is a great app to organize your notes in a classic hierarchical format.
Beyond that is where the magic happens. Yes, with tags, backlinks, and graphs Relanote is a truly compelling app to jumpstart your productivity.
With all the exciting features, it might be hard to know where to start in Relanote. Hence the purpose of my Relanote beginner’s guide. In this guide, I’ll cover the basics of Relanote and leave advanced features for another post.
Getting Started
It is so easy to get started creating notes. Here’s a peek at the user dashboard – available after you sign up with your email address and verify.
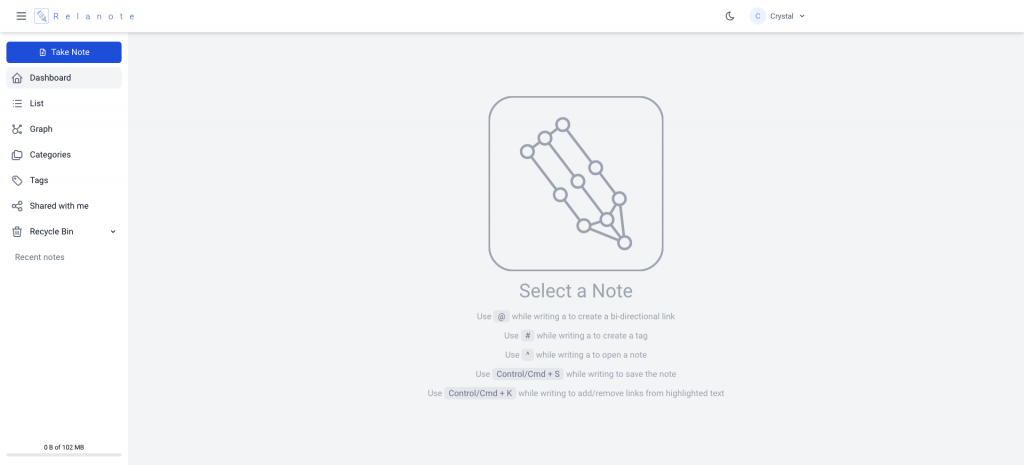
It’s clean with the options on the left and the composition area where you add your notes situated on the right.
The dashboard also features the shortcuts as a reminder. These include @, #, ^, Control/Cmd + S, Control/Cmd + K.
Personally, I took a screenshot of the shortcuts for easy referral because they’re not visible once I begin a new note. After my fourth note, I didn’t need to refer to the screenshot as I had the shortcuts memorized.
User Interface
The panel options include:
Dashboard – This will take you back to the opening page with the shortcuts – shown above.
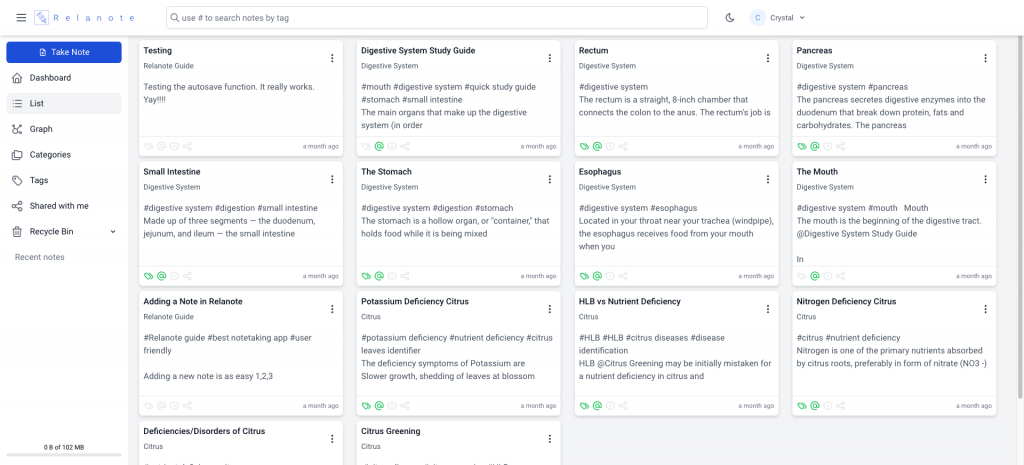
List – Here you’ll find a list of your notes in an organized layout. It shows the notes that are linked to other notes, tagged, and shared. The title of the note and a snapshot of what it includes are also visible in list view.
Graph – The graph view shows notes that are linked to one another. This view also has a quick guide for building notes directly in Graph View.
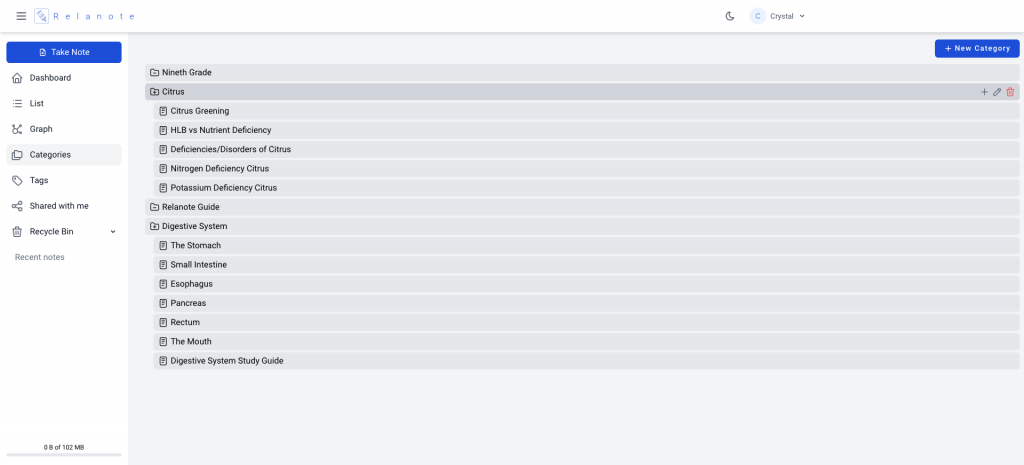
Categories – All your categories are visible in expandable/collapsible format in this tab. You can easily add or edit categories here.
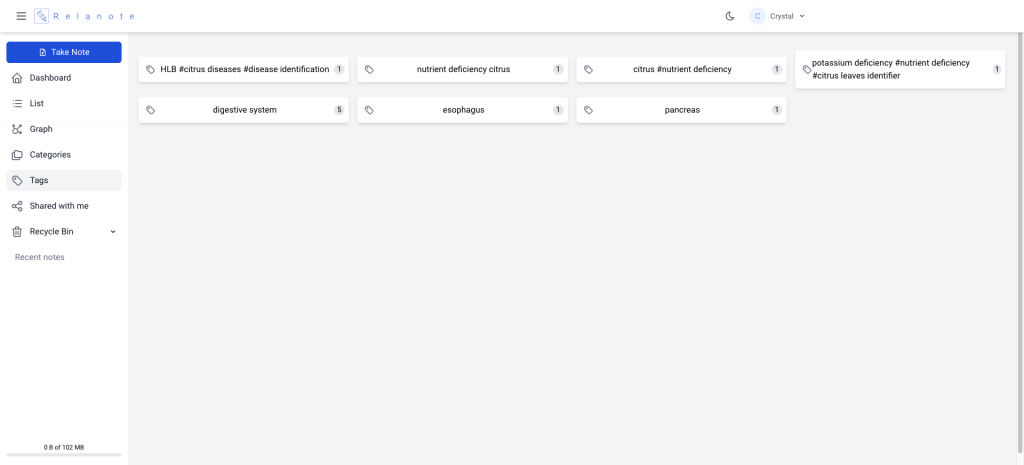
Tags – For viewing all your used tags with the number of notes attached to each tag.
Shared with me – Here you’ll find all the notes that were shared with you.
Recycle Bin – Notes and categories that you deleted will be available in the Recycle Bin.
Recent notes – Provides convenient access to new or recently opened notes.
Creating Your First Note
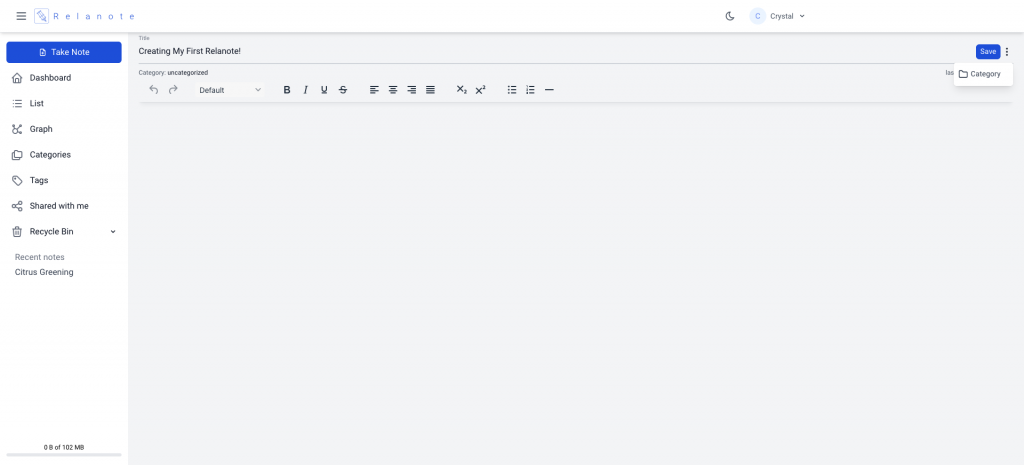
It all starts with the big blue button at the top left-hand corner.
Once the tab opens, you can begin composing your note.
Add the Title at the top.
On the extreme right, you can use the settings to add or select (if you created one) a category for your note.
Compose your note or copy and paste the information that you plan to save.
The formatting tools are simple and familiar. They include features for formatting your text, paragraph and header styles, alignment, superscript and subscript, bullet and numbering, hyperlinks, and uploads.
The Save button on the right saves your note using the title used. Relanote will Autosave your note as you continue to work on it.
Tags
Tags are optional but recommended if you want to keep your notes organized and also for ease of access. You can use tags to search notes across categories.
Choose your tags wisely. They do not have to be confined to a certain topic. You may use related topics as well. Relanote lets you use as many tags as you need.
Use the # to add a tag. For instance, #note-taking.
Categories
Use categories to organize your notes in folders. In the category tab, select New Category to create a new folder.
You can continue to create new folders for different categories or add them to established parent folders.
All your categories will be visible in a list format in the Category tab in expandable/collapsible folders.
Shortcuts
Back to shortcuts. Relanote keeps them simple, and I guarantee you’ll learn them with continued use.
Use @ while writing to create a bi-directional link
Use # while writing to create a tag
Use ^ while writing to open a note
Use Control/Cmd + S while writing to save the note
Use Control/Cmd + K while writing to add/remove links from highlighted text
Bi-Directional Links
Bi-directional linking may be as simple or as complex as you need it to be. For simple note-taking, which is the scope of this post, you can use bi-directional links to connect your notes.
Here’s a scenario that will hopefully explain how to use bi-directional links for good organization and productivity.
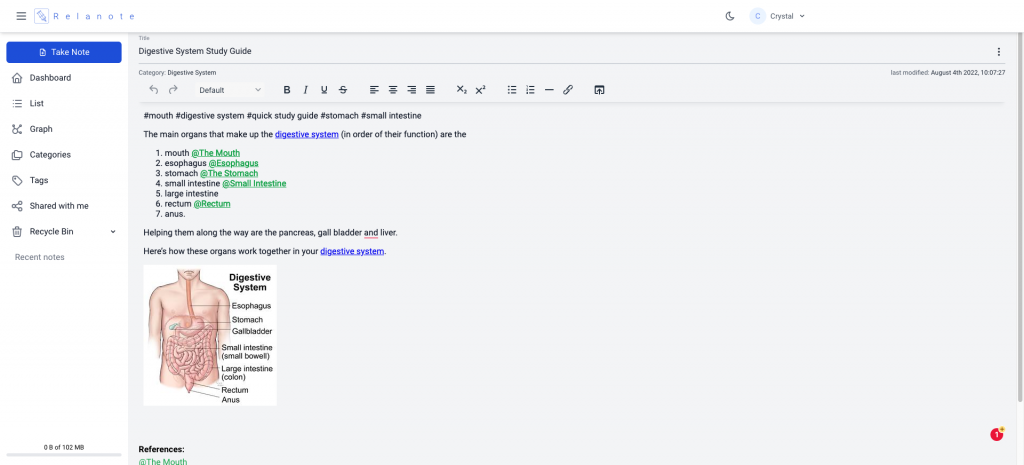
Let’s say I need to prepare for a biology test on the digestive system. I can transfer all my notes to one long page in Relanote. Truthfully, it will be a very long page that will be discouraging when it’s time to review.
An alternative is to separate each part of the study into a different note and link the entire study together through bi-directional links.
It now becomes like an index card where I can review and memorize one part of the digestive system at a time BUT easily move to another part using the internal links.
As you connect notes, Relanote creates a handy Reference at the bottom of the page that you can refer to for linked notes.
So how do you link notes? It’s easy!
Simple use the @ to pull up existing notes and form an automatic link.
Go Get It
If you’ve tried the host of note-taking apps and have not yet found your match, give Relanote a try. It is simple enough for basic note-taking but especially shines for those creative projects that branch into various directions. Using Wiki-style software would never be easier or more convenient. Best of all, it’s free for your first 50 notes!

